
Table of Contents
Introduction
What if your expense tracker didn’t require you to manually fill out forms?
Instead of selecting a category, entering an amount, and saving the expense yourself, you could simply say:
“I spent ₹500 on dinner.”
The application understands what you mean, identifies the required information, and saves the expense.
In this tutorial, we’ll build PocketPilot AI, a Flutter-based AI expense tracker using Firebase AI and a local SQLite database.
The interesting part isn’t just adding an AI chatbot to a Flutter application.
The AI can actually call specific functions provided by our application.
For example:
add_expense()— adds an expense to the databaseget_category_total()— retrieves the total spent in a category
The AI decides when one of these functions is required, while the Flutter application remains responsible for executing the actual database operation.
What We Are Building
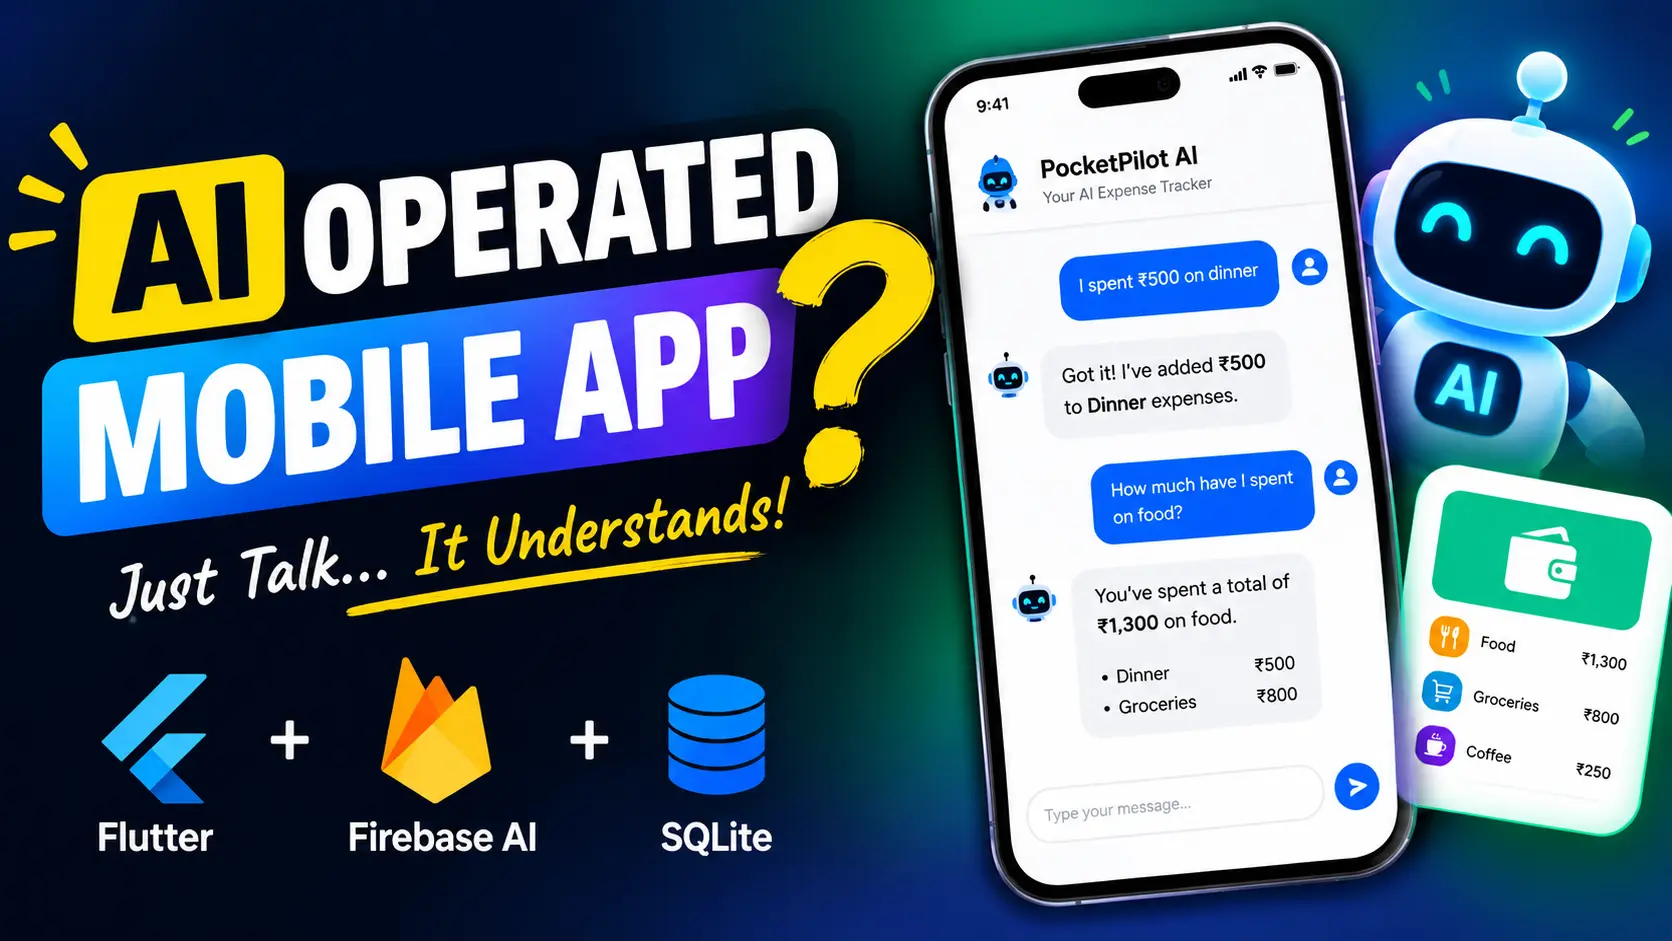
The final application looks like a simple AI-powered expense tracker.
Instead of interacting with traditional forms, the user can communicate naturally with the application.
For example:
I spent ₹500 on dinner
The AI understands:
Amount: 500
Category: Dinner
Description: Dinner
It then calls our add_expense function.
We can also ask:
How much have I spent on food?
The AI can call:
get_category_total
and return the result in a natural-language response.
The overall architecture looks like this:
User
  ↓
Flutter UI
  ↓
Firebase AI / Gemini
  ↓
Function Call
  ↓
AiService
  ↓
SQLite Database
  ↓
Function Response
  ↓
Firebase AI / Gemini
  ↓
Natural Language Response
This is the important concept behind the application.
The AI doesn’t directly access our database.
Instead, we expose controlled functions that the AI is allowed to request.
This project uses:
- Flutter
- Dart
- Firebase AI
- Gemini
- Firebase App Check
- SQLite
- Material 3
- UUID for expense IDs
The main Firebase packages used in the project include:
firebase_core: ^4.14.0
firebase_ai: ^4.0.0
Create the Flutter Project
Create a new Flutter project:
flutter create ai_expense
cd ai_expense
Then configure Firebase for the project using FlutterFire.
Once Firebase is configured, the project contains the generated firebase_options.dart file.
Initialize Firebase
The application starts from main.dart.
We don’t need a lot of code here.
The important part is initializing Firebase before launching the application.
Future<void> main() async {
  WidgetsFlutterBinding.ensureInitialized();

  await Firebase.initializeApp(
    options: DefaultFirebaseOptions.android,
  );

  await FirebaseAppCheck.instance.activate(
    providerAndroid: AndroidDebugProvider(),
  );

  runApp(const PocketPilotApp());
}
The application then loads the main HomeScreen.
home: const HomeScreen(),
The App Check configuration shown above is intended for Android development. For a production application, App Check should be configured appropriately for the production environment.
Create the Expense Model
We need a model representing an expense.
The application stores information such as:
ID
Amount
Category
Description
Date
A simplified version looks like:
class Expense {
  final String id;
  final double amount;
  final String category;
  final String description;
  final DateTime date;
}
This model is then stored in our local SQLite database.
Store Expenses in SQLite
The database layer is kept separate from the AI logic.
Our AppDatabase handles operations such as:
Add expense
Get expenses
Calculate category total
This separation is important.
The AI should not know how SQLite works.
It only needs to know:
“I have a function available that can add an expense.”
The database layer takes care of the implementation.
Connect Firebase AI
Now we reach the most interesting part of the application.
Our AiService is responsible for communicating with the Gemini model and handling function calls.
The service uses Firebase AI rather than placing a Gemini API key directly inside the Flutter application.
Conceptually, the service contains:
Firebase AI
      ↓
Gemini model
      ↓
Function declarations
      ↓
Tool call
      ↓
Database
We define the functions that the model is allowed to use.
Give the AI Tools
This is the key concept of the entire tutorial.
We provide the model with two functions.
add_expense
This function receives:
amount
category
description
and stores the expense in SQLite.
get_category_total
This function receives:
category
and returns the amount spent in that category.
The model doesn’t execute Dart code itself.
Instead, it produces a function call request.
Our application receives that request and executes the corresponding Dart function.
How add_expense Works
Suppose the user says:
I spent ₹500 on dinner.
The model can determine that the add_expense function should be called.
Conceptually, the request looks like:
{
  "amount": 500,
  "category": "Dinner",
  "description": "Dinner"
}
Our Flutter application receives these arguments.
The AiService creates an Expense object and sends it to:
database.addExpense(...)
The database then stores the expense.
The important part is that the AI requested the operation, but the application executed it.
How get_category_total Works
Now imagine the user asks:
How much have I spent on food?
The model can decide that it needs the get_category_total function.
The function receives the category:
food
Our database then calculates the total.
For example:
Food = ₹1,300
The result is returned to the AI.
The AI can then convert that result into a natural-language response such as:
You've spent ₹1,300 on food.
This creates a very natural interaction between the user and the application.
The Function-Calling Flow
The complete process looks like this:
Step 1 — User sends a message
I spent ₹500 on dinner.
Step 2 — AI analyzes the request
The model determines that an expense needs to be created.
Step 3 — AI requests a function
add_expense(
    amount = 500,
    category = "Dinner",
    description = "Dinner"
)
Step 4 — Flutter executes the function
Our AiService calls the database.
AppDatabase
    ↓
SQLite
Step 5 — Database returns the result
The application sends the function result back to the model.
Step 6 — AI generates the response
The user sees a normal conversational response.
Got it! I've added ₹500 to your dinner expenses.
This is much more powerful than simply sending a prompt to an AI model and displaying its text response.
Why Use Tools Instead of Letting AI Modify the Database?
This is one of the most important design decisions in the application.
We don’t want the AI to have unrestricted access to our database.
Instead, we expose specific operations.
For example:
AI
 │
 ├── add_expense()
 │
 └── get_category_total()
The AI can request these operations, but the actual implementation remains inside our application.
This gives us much more control over what the AI is allowed to do.
We could later add more functions such as:
delete_expense()
get_recent_expenses()
update_expense()
get_monthly_total()
without changing the fundamental architecture.
The Flutter UI
The HomeScreen provides the user interface.
The user can type a natural-language request instead of manually filling out an expense form.
For example:
I spent ₹250 on coffee
or:
Show me my grocery spending
The screen sends the message to AiService.
The AI service handles the communication with Firebase AI and the function-calling flow.
This keeps the UI layer relatively simple.
Project Structure
The project is organized around separate responsibilities:
lib/
│
├── main.dart
├── firebase_options.dart
│
├── screens/
│   └── home_screen.dart
│
├── services/
│   └── ai_service.dart
│
├── data/
│   └── database.dart
│
└── models/
    └── expense.dart
The important idea is separation of responsibilities:
UI
 ↓
AI Service
 ↓
Database
 ↓
SQLite
This makes the project easier to maintain and also makes it easier to extend later.
Try the Application
After configuring Firebase, run:
flutter pub get
flutter run
Then try messages such as:
I spent ₹500 on dinner
I spent ₹800 on groceries
I spent ₹250 on coffee
And finally:
How much have I spent on food?
The interesting part is that you don’t explicitly tell the application which function to call.
The AI determines which available tool is relevant.
What Makes This Different From a Chatbot?
A traditional AI chatbot mainly does this:
User → AI → Text
Our application does this:
User
  ↓
AI
  ↓
Tool
  ↓
Application Logic
  ↓
Database
  ↓
AI
  ↓
User
That’s a significant difference.
We’re not simply adding an AI chat screen to an existing application.
We’re allowing the AI to interact with controlled capabilities of the application.
This pattern can be used far beyond expense trackers.
For example:
AI + Banking App
AI + Shopping App
AI + Fitness App
AI + Productivity App
AI + Travel App
AI + CRM
The same concept applies:
Give the AI tools, execute those tools inside your application, and return the results to the model.
Video Tutorial :
Source Code
You can find the complete project on GitHub:
GitHub: will post soon…
The repository contains the complete Flutter project, including the Firebase AI integration, database layer, expense model, and UI.
Conclusion
In this project, we built an AI-powered expense tracker using Flutter and Firebase AI.
The most important concept wasn’t the UI or even the database.
It was AI function calling.
Instead of allowing the AI to directly manipulate application data, we gave it controlled functions:
add_expense()
get_category_total()
The AI decides which function is required.
Flutter executes the function.
SQLite stores or retrieves the data.
The result is sent back to the AI.
And the AI converts that result into a natural conversation with the user.
This architecture opens up many possibilities for building AI-powered mobile applications where the AI doesn’t just talk to the user — it can actually operate the application through controlled tools.
If you’re interested in building more AI-powered Flutter applications, this is a pattern worth understanding.
More Flutter Tutorials
Find more interesting flutter tutorials here