Date Picker Dialog :
Android Date Picker Dialog is used to select date in various apps, generally apps where we need the requirement of placing orders, ore providing details regarding our transactions we require to give date.
So, in general there is a DatePickerDialog in android we are using it to fetch the date and store it.
In my previous tutorial i have shown fetching individual values without any dialog-box.
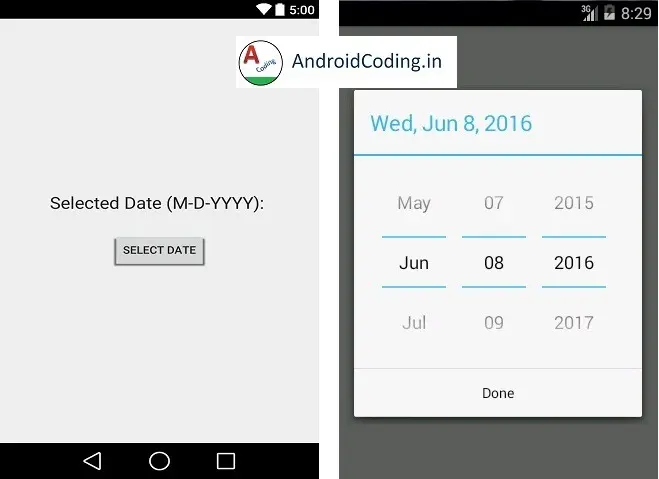
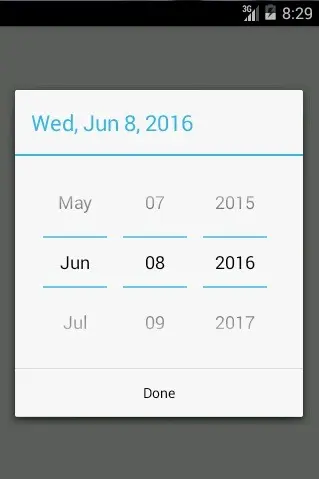
you can have a look here –> Getting Time and Date DatePickerDialog which i am going to show in this blog will be like this.
Depending upon the operating system i.e., the android version the style keeps on changing from one form to another this just a representation of how the dialog looks like also you can customize the designs.
Date Picker Dialog Video Tutorial:
MainActivity.java
Getting date as in terms of DD/MM/YYYY fetching individual values
final Calendar c = Calendar.getInstance(); // Calendar
        year  = c.get(Calendar.YEAR);      // getting year
        month = c.get(Calendar.MONTH);     // getting month
        day   = c.get(Calendar.DAY_OF_MONTH);// getting day
Showing time picker dialog
showDialog(DATE_PICKER_ID);
Date picker Listener to get back the selected day, month and year in a specified format here you can edit the format liek providing dividers in between date, time and month.
In the method onDateSet() we can find all these parameters and can edit them, this method is called once the dialog is closed.
public class MainActivity extends Activity {

    private TextView Output;
    private Button changeDate;

    private int year;
    private int month;
    private int day;

    static final int DATE_PICKER_ID = 1111;

    @Override
    protected void onCreate(Bundle savedInstanceState) {
        super.onCreate(savedInstanceState);
        setContentView(R.layout.activity_main);

        Output = (TextView) findViewById(R.id.Output);
        changeDate = (Button) findViewById(R.id.changeDate);

        // Get current date by calender

        final Calendar c = Calendar.getInstance();
        year  = c.get(Calendar.YEAR);
        month = c.get(Calendar.MONTH);
        day   = c.get(Calendar.DAY_OF_MONTH);

        // Show current date

        Output.setText(new StringBuilder()
                // Month is 0 based, just add 1
                .append(month + 1).append("-").append(day).append("-")
                .append(year).append(" "));

        // Button listener to show date picker dialog

        changeDate.setOnClickListener(new View.OnClickListener() {

            @Override
            public void onClick(View v) {

                // On button click show datepicker dialog
                showDialog(DATE_PICKER_ID);

            }

        });
    }

    @Override
    protected Dialog onCreateDialog(int id) {
        switch (id) {
            case DATE_PICKER_ID:

                // open datepicker dialog.
                // set date picker for current date
                // add pickerListener listner to date picker
                return new DatePickerDialog(this, pickerListener, year, month,day);
        }
        return null;
    }

    private DatePickerDialog.OnDateSetListener pickerListener = new DatePickerDialog.OnDateSetListener() {

        // when dialog box is closed, below method will be called.
        @Override
        public void onDateSet(DatePicker view, int selectedYear,
                              int selectedMonth, int selectedDay) {

            year  = selectedYear;
            month = selectedMonth;
            day   = selectedDay;

            // Show selected date
            Output.setText(new StringBuilder().append(month + 1)
                    .append("-").append(day).append("-").append(year)
                    .append(" "));

        }
    };
}
activity_main.xml
Adding a button to open DatePickerDialog and also another textview to set date generally when you need in you app you can extract the date from this textview.
Here we will consider a simple design where we will have a textview to open DatePickerDialog and select the date and set it to the textview.
<?xml version="1.0" encoding="utf-8"?>
<LinearLayout
    xmlns:android="http://schemas.android.com/apk/res/android"
    xmlns:tools="http://schemas.android.com/tools"
    android:layout_width="match_parent"
    android:layout_height="match_parent"
    android:orientation="vertical"
    android:gravity="center">


    <TextView
        android:layout_width="wrap_content"
        android:layout_height="wrap_content"
        android:text="Selected Date (M-D-YYYY): "
        android:textAppearance="?android:attr/textAppearanceLarge" />

    <TextView
        android:id="@+id/Output"
        android:layout_width="wrap_content"
        android:layout_height="wrap_content"
        android:text=""
        android:textAppearance="?android:attr/textAppearanceLarge" />

    <Button
        android:id="@+id/changeDate"
        android:layout_width="wrap_content"
        android:layout_height="wrap_content"
        android:text="Select Date"/>

</LinearLayout>
Date Picker Dialog Output :
You can find the date picker dialog and in real time you can make modifications to provide range of dates i.e., current dat to be the initial day or last day in the picker and also the styles and design.
If you have any query on this tutorial Date Picker Dialog please comment below, Also like, share & subscribe this tutorial if you like it.


