Android image intent :
Selecting Images from gallery to app using android image intent is a feature we generally see in messenger apps like whatsapp, facebook. and many more.. messaging apps as the list is expanding day by day.
Also few apps where we need to upload our profile picture, apps like olx, quickr where we can sell goods online then we will be using this type of feature.
By using this feature we can get images from our gallery into image view from there we can upload the image or can do whatever we want it to be.
In recent updates for android 11 we need to specify the image capture permission android manifest file so as to fetch the images as below.
<intent>
    <action android:name="android.media.action.IMAGE_CAPTURE" />
</intent>
And not only images but for fetching video, making calls we need to specify the required queries as below.
<queries>
    <intent>
        <action android:name="android.intent.action.PICK" />
        <data android:mimeType="*/*" />
    </intent>
    <intent>
        <action android:name="android.media.action.VIDEO_CAPTURE" />
    </intent>
    <intent>
        <action android:name="android.media.action.IMAGE_CAPTURE" />
    </intent>
    <intent>
        <action android:name="android.intent.action.DIAL" />
    </intent>
</queries>
So now i think you have a basic information about what we are going to do here in this tutorial, i.e., android studio tutorial on selecting an image from gallery.
Creating activity_main.xml :
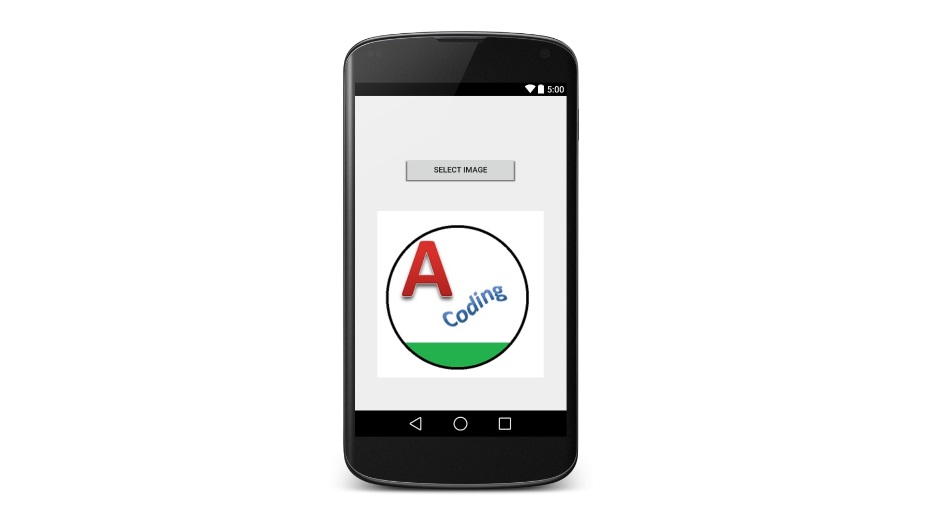
We need to place the selected image into imageview, add a imageview and also place a button for selecting a image through android image intent.
<?xml version="1.0" encoding="utf-8"?>

<LinearLayout xmlns:android="http://schemas.android.com/apk/res/android"
    android:orientation="vertical"
    android:layout_width="match_parent"
    android:layout_height="match_parent"
    android:gravity="center">

    <Button
        android:layout_width="200dp"
        android:text="Select Image"
        android:id="@+id/selectBtn"
        android:layout_marginTop="50dp"
        android:layout_height="wrap_content">
    </Button>

    <ImageView
        android:layout_width="300dp"
        android:layout_height="300dp"
        android:layout_marginTop="50dp"
        android:id="@+id/showImage">
    </ImageView>


</LinearLayout>
now we have our layout file ready then we need to do necessary coding to select image
Creating MainActivity :
We need to use a android image intent for picking up a image url.
Intent photoPicker = new Intent(Intent.ACTION_GET_CONTENT);
photoPicker.setType("image/*");
startActivityForResult(photoPicker, 1);
now we got image url then we need to query image using cursor
String[] filePathColumn = {MediaStore.Images.Media.DATA};
                Cursor cursor = getContentResolver().query(selectedImage, filePathColumn, null, null, null);
                cursor.moveToFirst();
                int columnIndex = cursor.getColumnIndex(filePathColumn[0]);
                String filePath = cursor.getString(columnIndex);
                cursor.close();
now set the image to imageview
   bitmap = BitmapFactory.decodeFile(filePath);

    showImage.setBackgroundResource(0);
    showImage.setImageBitmap(bitmap);
MainActivity.java :
Providing the full code for android image intent to fetch images from devices.
We can use View binding for more efficiency
package selectimage.androidcoding.abhishek.selectimage;

import android.app.Activity;
import android.content.Intent;
import android.database.Cursor;
import android.graphics.Bitmap;
import android.graphics.BitmapFactory;
import android.net.Uri;
import android.os.Bundle;
import android.provider.MediaStore;
import android.util.Log;
import android.view.View;
import android.view.View.OnClickListener;
import android.widget.Button;
import android.widget.ImageView;
import android.widget.Toast;

public class MainActivity extends Activity
{
    Button selectBtn;
    ImageView showImage;
    Bitmap bitmap;

    @Override
    public void onCreate(Bundle savedInstanceState)
    {
        super.onCreate(savedInstanceState);
        setContentView(R.layout.activity_main);

        selectBtn   = (Button)findViewById(R.id.selectBtn);
        showImage = (ImageView)findViewById(R.id.showImage);

        Toast.makeText(MainActivity.this, "", Toast.LENGTH_LONG).show();

        selectBtn.setOnClickListener(new OnClickListener()
        {
            @Override
            public void onClick(View arg0)
            {

                Intent photoPicker = new Intent(Intent.ACTION_GET_CONTENT);
                photoPicker.setType("image/*");
                startActivityForResult(photoPicker, 1);

            }
        });
    }


    @Override
    protected void onActivityResult(int requestCode, int resultcode, Intent intent)
    {
        super.onActivityResult(requestCode, resultcode, intent);

        if (requestCode == 1)
        {
            if (intent != null && resultcode == RESULT_OK)
            {

                Uri selectedImage = intent.getData();

                String[] filePathColumn = {MediaStore.Images.Media.DATA};
                Cursor cursor = getContentResolver().query(selectedImage, filePathColumn, null, null, null);
                cursor.moveToFirst();
                int columnIndex = cursor.getColumnIndex(filePathColumn[0]);
                String filePath = cursor.getString(columnIndex);
                cursor.close();

                if(bitmap != null && !bitmap.isRecycled())
                {
                    bitmap = null;
                }

                bitmap = BitmapFactory.decodeFile(filePath);

                showImage.setBackgroundResource(0);
                showImage.setImageBitmap(bitmap);


            }
            else
            {
                Log.d("Status:", "Action Not Completed");
            }
        }
    }
}
AndroidManifest.xml
Permission :
We need to add a permission by which we can access gallery on android device.
<uses-permission android:name="android.permission.WRITE_EXTERNAL_STORAGE"/>
And also you need to specify the query’s to support Android image intent from version 11 and above.
<?xml version="1.0" encoding="utf-8"?>

<manifest xmlns:android="http://schemas.android.com/apk/res/android"
    package="imagepick.android.com.gallerytoimageview">

    <uses-permission android:name="android.permission.WRITE_EXTERNAL_STORAGE" />

    <queries>
        <intent>
            <action android:name="android.intent.action.PICK" />
            <data android:mimeType="*/*" />
        </intent>
        <intent>
            <action android:name="android.media.action.VIDEO_CAPTURE" />
        </intent>
        <intent>
            <action android:name="android.media.action.IMAGE_CAPTURE" />
        </intent>
        <intent>
            <action android:name="android.intent.action.DIAL" />
        </intent>
    </queries>


    <application
        android:allowBackup="true"
        android:icon="@mipmap/ic_launcher"
        android:label="@string/app_name"
        android:supportsRtl="true"
        android:theme="@style/AppTheme">
        <activity android:name=".MainActivity">
            <intent-filter>
                <action android:name="android.intent.action.MAIN" />

                <category android:name="android.intent.category.LAUNCHER" />
            </intent-filter>
        </activity>
    </application>

</manifest>
Android image intent output :
This below screen depicts the usage of Android image intent.

Any query’s in this tutorial on Android image intent let us know in the comment section below.
If you like this tutorial do like and share this tutorial for more interesting updates.