Flutter Web App Form :
Flutter web app form, web app is the new feature provided for developers till then flutter provides a interface to code apps for mobile apps on Android and iOS platforms.
But with the release of flutter 2.0 we got the stable web version of web support from flutter using which the same code which was used to develop is also used for web app development.
In our previous tutorial we have seen the introduction on flutter web app and in this tutorial we will see how to design a flutter web app form which works on mobile and web browser as well.
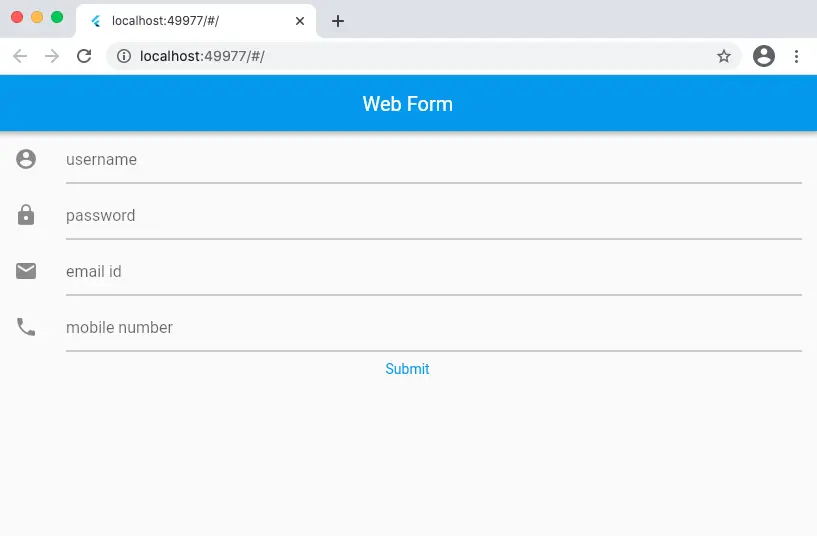
We will design a user interface such that we accept user information such as name, email, password and mobile number and print them once the submit button is pressed.
Flutter Web App Form Video Tutorial :
Go through the below tutorial for more detailed information.
Let’s start coding
main.dart :
Initialize with void main() considering default class MyApp()
void main(){
  runApp(MyApp());
}
MyApp is extending a StatelessWidget and debug banner is disabled
debugShowCheckedModeBanner: false,
class MyApp extends StatelessWidget {
  @override
  Widget build(BuildContext context) {
    return MaterialApp(
      debugShowCheckedModeBanner: false,
      home: Form(),
    );
  }
}
Form() Class is extending a StatefulWidget so as to refresh the State of the class
class Form extends StatefulWidget {
  @override
  _FormState createState() => _FormState();
}
Define controllers for name, password, email and mobile number
final nameController = TextEditingController();
final passwordController = TextEditingController();
final emailController = TextEditingController();
final mobileNumberController = TextEditingController();
Return a Scaffold using which we can structure our app add a AppBar, body
Scaffold(
  appBar: AppBar(title: Text('Web Form'),),
  body: Container(

    child:
  ),
);
Design a Text field using which we can accept user input with the help of ListTile widget
leading : Can add a icon to the field
title : can specify the form field here or can provide a default title
controller : used to fetch the data and access the field
ListTile(
  leading: Icon(Icons.account_circle),
  title: TextFormField(
    decoration: InputDecoration(
        hintText: 'username'
    ),
    controller: nameController,
  ),
),
Define the same for remaining fields password, email and mobile number.
Now define a button to tap and fetch the details once entered into the respective fields
TextButton(
    onPressed: (){},
    child: Text('Submit')
),
Inside onPressed specify the setState and print the data entered into fields
setState(() {

  print(nameController.text.toString());
  print(passwordController.text.toString());
  print(emailController.text.toString());
  print(mobileNumberController.text.toString());

});
Full Code :
Providing the full code for web integration
import 'package:flutter/material.dart';

void main(){
  runApp(MyApp());
}

class MyApp extends StatelessWidget {
  @override
  Widget build(BuildContext context) {
    return MaterialApp(
      debugShowCheckedModeBanner: false,
      home: Form(),
    );
  }
}

class Form extends StatefulWidget {
  @override
  _FormState createState() => _FormState();
}

class _FormState extends State<Form> {

  final nameController = TextEditingController();
  final passwordController = TextEditingController();
  final emailController = TextEditingController();
  final mobileNumberController = TextEditingController();

  @override
  Widget build(BuildContext context) {
    return Scaffold(
      appBar: AppBar(title: Text('Web Form'),),
      body: Container(

        child: Column(

          children: [

            ListTile(
              leading: Icon(Icons.account_circle),
              title: TextFormField(
                decoration: InputDecoration(
                    hintText: 'username'
                ),
                controller: nameController,
              ),
            ),

            ListTile(
              leading: Icon(Icons.lock),
              title: TextFormField(
                decoration: InputDecoration(
                    hintText: 'password'
                ),
                controller: passwordController,
              ),
            ),

            ListTile(
              leading: Icon(Icons.email),
              title: TextFormField(
                decoration: InputDecoration(
                    hintText: 'email id'
                ),
                controller: emailController,
              ),
            ),

            ListTile(
              leading: Icon(Icons.phone),
              title: TextFormField(
                decoration: InputDecoration(
                    hintText: 'mobile number'
                ),
                controller: mobileNumberController,
              ),
            ),

            TextButton(onPressed: (){

              setState(() {

                print(nameController.text.toString());
                print(passwordController.text.toString());
                print(emailController.text.toString());
                print(mobileNumberController.text.toString());
              });

            }, child: Text('Submit')),

          ],
        ),
      ),
    );
  }
}
Output :
The screen below depicts the usage of flutter web app form


