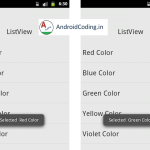
Android arraylist listview :
Android arraylist listview tutorial helps you to learn how to set data to ListView using adapter class with arraylist.
Here, i will use a getview interface and will set data to the listview, using setter and getter’s.Here in this tutorial i will be showing android operating system (OS) name & category as fields in listview. Given user a functionality to add these fields dynamically, and also explaining how a custom listview functionality works out.
So, this is a little intro regarding the topic let us get into further details, android custom listview example.
Android arraylist listview Video Tutorial :
First of all we will be seeing Getter and Setter i.e., Model Class, by using this we are fetching data from user and populating to our listview.
I have made an easy to understand interface where user will enter data and this data will be saved into Array List and this array list will be populated on a Listview using a adapter i.e., our Custom ListView adapter.
Here, we are getting data form user and setting it to android arraylist listview as below. After setting data listview will be updated with data.
 Data version = new Data(); // Creating Data object

                version.setId("1"); // setting ID
                version.setName(versionstr); // setting name
                version.setCategory(osstr);  setting category

                dataList.add(version);

                listview.setAdapter(adapter);

                adapter.notifyDataSetChanged();
Now we will be fetching data from array list using getter, Here version List is array form which data is fetched
versionList.get(position).getName() // getting name
And setting it to textview as
holder.name.setText("Version Name :"+versionList.get(position).getName());Creating Getter and Setter :
Right click in the editor and choose Generate Getter and Setter option, select the variables for which these values are to be generated.
public class Data {

    private String id;
    private String name;
    private String category;

    public Data() {
        // TODO Auto-generated constructor stub
    }

    public String getId() {
        return id;
    }

    public void setId(String id) {
        this.id = id;
    }

    public String getName() {
        return name;
    }

    public void setName(String name) {
        this.name = name;
    }

    public String getCategory() {
        return category;
    }

    public void setCategory(String category) {
        this.category = category;
    }

    public Data(String name, String category) {
        super();
        this.name = name;
        this.category = category;

    }


}
MainActivity.java
Providing the full code for android arraylist listview integration.
import android.support.v7.app.AppCompatActivity;
import android.os.Bundle;
import android.view.View;
import android.widget.Button;
import android.widget.EditText;
import android.widget.ListView;

import java.util.ArrayList;

public class MainActivity extends AppCompatActivity {

    ArrayList<Data> dataList;

    ListView listview;

    ListAdapter adapter;

    EditText versiontxt,ostxt;

    Button insertbut;

    String versionstr,osstr;

    @Override
    protected void onCreate(Bundle savedInstanceState) {
        super.onCreate(savedInstanceState);
        setContentView(R.layout.activity_main);

        listview = (ListView) findViewById(R.id.list);

        versiontxt = (EditText) findViewById(R.id.versiontxt);
        ostxt = (EditText) findViewById(R.id.ostxt);

        dataList = new ArrayList<Data>();

        adapter = new ListAdapter(getApplicationContext(), R.layout.view_row, dataList);

        insertbut = (Button) findViewById(R.id.insertbut);

        insertbut.setOnClickListener(new View.OnClickListener() {
            @Override
            public void onClick(View v) {

                versionstr = versiontxt.getText().toString();
                osstr = ostxt.getText().toString();


                Data version = new Data();

                version.setId("1");
                version.setName(versionstr);
                version.setCategory(osstr);

                dataList.add(version);

                listview.setAdapter(adapter);

                adapter.notifyDataSetChanged();

            }
        });

        listview.setAdapter(adapter);

        adapter.notifyDataSetChanged();

    }
}
No we will create a Custom Listview adapter class where we will append this data into a list view
Creating a ListAdapter :
Now we will try to create a list adapter.
import android.content.Context;

import android.view.LayoutInflater;
import android.view.View;
import android.view.ViewGroup;
import android.widget.ArrayAdapter;
import android.widget.TextView;

import java.util.ArrayList;

public class ListAdapter extends ArrayAdapter<Data> {
    ArrayList<Data> versionList;
    LayoutInflater vi;
    int Resource;


    public ListAdapter(Context context, int resource, ArrayList<Data> objects) {
        super(context, resource, objects);
        vi = (LayoutInflater) context
                .getSystemService(Context.LAYOUT_INFLATER_SERVICE);
        Resource = resource;
        versionList = objects;
    }

    @Override
    public int getItemViewType(int position) {
        return position;
    }

    @Override
    public int getViewTypeCount() {
        return 500;
    }


    @Override
    public View getView(final int position, View convertView, ViewGroup parent) {
        // convert view = design
        View v = convertView;
        final ViewHolder holder;

        if (v == null) {
            v = vi.inflate(R.layout.view_row, null);
            holder = new ViewHolder();
            holder.name = (TextView) v.findViewById(R.id.getname);
            holder.category = (TextView) v.findViewById(R.id.getcategory);
            v.setTag(holder);
        } else {
            holder = (ViewHolder) v.getTag();
        }

        holder.name.setText("Version Name :"+versionList.get(position).getName());
        holder.category.setText("OS :"+versionList.get(position).getCategory());

        return v;
    }

    private static class ViewHolder {

        public TextView name;
        public TextView category;


    }

    }
[/et_pb_text][et_pb_text admin_label=”Text” background_layout=”light” text_orientation=”left” use_border_color=”off” border_color=”#ffffff” border_style=”solid”]
activity_main.xml :
Adding two edittext’s for user input and to populate the saved data into android arraylist listview.
<?xml version="1.0" encoding="utf-8"?>
<LinearLayout xmlns:android="http://schemas.android.com/apk/res/android"
    xmlns:tools="http://schemas.android.com/tools"
    android:layout_width="match_parent"
    android:layout_height="match_parent"
    android:orientation="vertical"
    android:padding="20dp">

    <EditText
        android:layout_width="match_parent"
        android:layout_height="wrap_content"
        android:hint="enter version"
        android:id="@+id/versiontxt" />

    <EditText
        android:layout_width="match_parent"
        android:layout_height="wrap_content"
        android:hint="enter os"
        android:id="@+id/ostxt" />

    <Button
        android:layout_width="wrap_content"
        android:layout_height="wrap_content"
        android:text="Insert"
        android:id="@+id/insertbut"
        android:layout_marginTop="10dp"
        android:layout_marginBottom="10dp"
        android:layout_gravity="center_horizontal" />

    <ListView
        android:id="@+id/list"
        android:layout_width="match_parent"
        android:layout_height="match_parent"
        android:dividerHeight="10.0sp"
        tools:listitem="@layout/view_row" />

</LinearLayout>
Now designing listview row.
<?xml version="1.0" encoding="utf-8"?>
<LinearLayout xmlns:android="http://schemas.android.com/apk/res/android"
    android:id="@+id/LinearLayout1"
    android:layout_width="match_parent"
    android:layout_height="wrap_content"
    android:background="#ffffff"
    android:descendantFocusability="afterDescendants"
    android:orientation="vertical">

    <LinearLayout
        android:orientation="vertical"
        android:layout_width="match_parent"
        android:layout_height="wrap_content"
        android:padding="10dp">

    <TextView
        android:id="@+id/getname"
        android:layout_width="wrap_content"
        android:layout_height="wrap_content"
        android:layout_weight="1"
        android:textSize="15dp"
        android:textColor="#000000" />

    <TextView
        android:id="@+id/getcategory"
        android:layout_width="wrap_content"
        android:layout_height="wrap_content"
        android:textColor="#000000"
        android:layout_weight="1"
        android:textSize="15dp" />

    </LinearLayout>

</LinearLayout>
Android arraylist listview Output :

If you are having any query’s in this tutorial on android arraylist listview do let us know in the comment section below.If you like this tutorial do like and share us for more interesting updates.


